Showing posts with label kitchen table. Show all posts

Tuesday, January 13, 2015

From Wash Tub to Kitchen Island


So this is what I brought home a couple of days ago. Mr. Magazine gave me that 'what are you up to now' look.
No I'm not planning on washing all the clothes by hand, I had something else in mind.


I really needed a small kitchen island and I knew I could make this work!

For this DIY project you will need...
******************************
*an old or reproduction wash tub
try looking on craigslist or Amazon
or your local Hobby Lobby.

*scrap wood, we used 2x6's and 1x4's
or get some from Home Depot or your local lumber yard

*nails, we used our nail gun

*stain, we used Minwax Dark Walnut from Home Depot


Measure your tub and add enough for an overhang of 3" on each side.
The bottom layer was built using 2x8's held together with two rails fit to set inside the tub,  then nail six 1x6's (depending on the measurements of your tub) running the opposite direction to the top of the base.


The top can be lifted off to allow for storage inside.

Perfect for all those cookbooks!
Did you know you can make your own recipe books on Shutterfly?


Once your top is built just set in place. It should be secure with little to no wiggle room.


Just what I had in mind. Perfect!


A little staining and
 I thought it was done....
but it was missing something....
a bottom shelf!

Here it is with the shelf added and accessorized with some goodies. I also dry brushed some ASCP in Old White to the legs.


An old tray fit perfectly and added extra storage and display space.


An old scale and spool of twine added to the old kitchen feel.
I'm really happy with this new addition to our kitchen.


The handles on the tub make handy towel holders.


Love it!


See more posts on the washtub/kitchen island HERE


Monday, January 12, 2015

What I Did With The Wash Tub


Wondering what I did with the washtub?


We needed an island in our kitchen, a small island.
This fit the bill.

So we added a wood top to make it function as a kitchen island.


We cut three  2x8 boards to make the base then added six 1x6 boards to the top allowing for a 3/4 overhang from the base. The overall overhang is 3 inches in all sides.


Boards where added to the bottom so it would fit down inside the wash tub and not move around but we can remove it whenever we want.


Then I stained it, it came out a little dark and I may lighten it up later.


And all that storage room inside was not wasted. I store my cookbooks in there, just lift off the top and there they are!


We no longer have to walk all the way from the fridge to the counter to make sandwiches, yeah we're lazy.


It ended up being the perfect height and size but I am considering adding some wheels so I can move it around. I also later added a shelf to the bottom allowing for more display space (see below). Click the update below to read about the shelf.


 Stay tuned for some changes in my Pantry.

*Update to my wash tub kitchen island click HERE

Funky Junk Interiors
Tweak It Tuesday
Amaze Me Monday
The Scoop
Inspire Me Monday


Friday, January 3, 2014

MMS Milk Paint Table


 Hope you all had a great start to the New Year. My resolution for this year is to STOP PROCRASTINATING!!! I've seen bloggers adopting a WORD for the year, well I can't narrow mine down to one, I need three.....it's 'GIT-ER- DONE'.....because I over think everything til I talk myself out of doing anything lol. So I'm just gonna jump in there and get stuff done this year starting with this little table.
 My father in  law used this little table for over 50 years, but it's actually older than that because his wife's parents used it before he did. So it's  80+ years old.


here's the before.......


It obviously has seen a lot of use and this is the very spot where it was used for all those years.


I decided to keep it in the same place in the kitchen but spruce it up a little bit. First I added a new top. I used tongue and groove boards and attached them using my nail gun.
Then I sanded, beat it up a bit with a screw driver, a hammer and a sharp pick to make it look old. Then I stained it with Early American Minwax Stain.


Next I had to decide what to do with the bottom part. I didn't know if I wanted to use Milk Paint or Chalk Paint, I ultimately decided to use MMS milk paint in Linen because I wanted the chippiness.


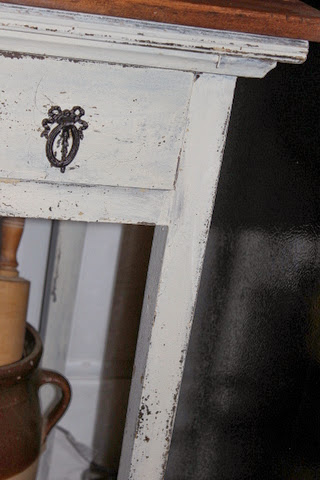
Here's the final look, I reused the same pulls, I love those pulls, they're little drop pulls with bows. They are original to the table but they never stood out before due to the dark color of the table.

And it has the perfect amount of chippiness, thanks Miss Mustard Seed!


I love how it turned out. It's so handy in this spot, I keep dish towels and pot holders in the drawer.
So that's one project down, now on to the next!

Partying at...
Inspire Me Tuesday
Tweak It Tuesday
Wow Us Wednesday
Be Inspired
The Scoop
Power Of Paint Party
Fabulously Creative Friday
Creative Things Thursday
Feathered Nest Friday
Furniture Feature Friday


LinkWithin

Related Posts Plugin for WordPress, Blogger...